

Have you been tossing around the idea of building a pole barn? Maybe you already know what you’re looking for, but the current supply and demand issues are making you leary to move forward (we certainly understand if that’s the case). On the other hand, perhaps you have already decided to move forward with construction, but you’re unsure where you need to start.
The thought of building a pole barn may seem daunting at times, especially if this is your first time doing it. To help make the process easier for you, we’ve put together The Ultimate Guide to Building a Pole Barn.
This guide will highlight everything you need to know. From choosing a post-frame builder to scheduling interior and exterior building features. You’ll be well on your way before you know it.

Building a post-frame building takes a lot of time, commitment, and dedication on the buyer’s end. Many parts and pieces go into the decision-making process, but most importantly, who will construct your pole building?
Before you reach out to any post-frame builder, you must familiarize yourself with certain aspects of post-frame construction. We’ve put together a list of key points to keep in mind when doing your builder research.
Years in Service
 First, a quality post-frame builder will focus on establishing a trustworthy relationship with their customers, whether you decide to build with them or not.
They’ll identify solutions to the buyer’s challenges through open-ended questions and active listening. Building trust through a consultative approach is crucial from the get-go.
Choose a construction company with at least 20+ years of experience in the post-frame industry. This longevity shows they can handle an ever-changing economy and environment.
Builder’s Risk Insurance
A quality pole barn builder will require their customers to purchase builder’s risk insurance.
This policy protects you from theft, storm damage, or vandalism that may occur during post-frame construction. Typically, this policy is in effect until the work is complete and the property is ready for use or occupancy.
Be leary of construction companies that do not require builder’s risk insurance. If you choose to go with someone who doesn’t require this, who will be responsible if damages occur? We certainly hope it won’t be you.
Crew Power
The crew size depends on the type of building, specifications, and scheduling logistics.
At FBi, the crew size ranges depending on building size. For smaller residential buildings, our crews are typically three to four workers. For larger agricultural or commercial buildings, the crews range anywhere from four to ten workers.
Precise timing is what it takes to keep your post-frame project on time and under budget.
If you choose to go with a post-frame builder who uses subcontracted construction crews, beware of issues like job jumping or material delivery delays. This can cause problems with scheduling.
Code Compliance
Your pole barn must comply with written, adopted, or required building codes for post-frame construction. Please keep in mind that building codes are minimum standards. It’s up to you to decide the perfect balance between structural strength and cost.
But what if you’re not an expert in pole barn structural integrity? A quality post-frame builder will provide a licensed engineer stamp identifying the critical building components on all drawings.
This stamp certifies that the entire structure will meet design requirements from top to bottom. Knowing that the construction company is willing to provide accredited drawings may be enough assurance for you.
Warranty
 Lastly, a warranty is a manufacturers’ written guarantee to purchasers promising to repair or replace defective products/services within a certain period.
It’s crucial to note that there’s no standard pole barn warranty. With that being said, you don’t want to skim through construction warranties.
A quality post-frame builder will offer a non-prorated warranty. This type of warranty promises that any defect in building materials and craftsmanship is covered throughout the entire term.
For example, a 20-year non-prorated warranty means that the items are 100% covered for 20 years. A 40-year prorated warranty means that the items are 50% covered for 20 years.
Moreover, who is your point of contact when potential warranty claims arise?
Do you call the corporate office or the salesperson responsible for selling your pole barn? Do you have to deal with subcontractors or third-party suppliers?
You should select a post-frame builder who will handle these situations on your behalf—bonus points for construction companies who have their own repair crews on deck.
There are numerous features you can opt for in your new pole barn. Below are just a few that you’ll want to consider adding:
- Sliding or overhead doors?
- How many walk doors will you need?
- Traditional laminated columns or Perma-Columns?
- Which style windows are best?
- Should you include a porch in the building design?
- Finally, how will you finish the interior of your building?
Below we detail different exterior and interior features for you to choose from.
Exterior Finishes
1) Steel Siding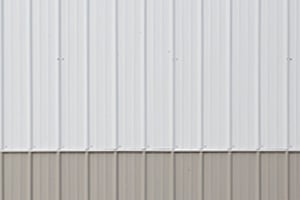 It’s lightweight and easy to install (applied directly onto the framing without any backing material). Your pole barn builder will handle this portion of the job – no subcontractors are needed.
The most common exterior option in post-frame construction is steel.
It’s lightweight and easy to install (applied directly onto the framing without any backing material). Your pole barn builder will handle this portion of the job – no subcontractors are needed.
Moreover, metal panels are low maintenance and damage-resistant when properly installed. They can last 30 to 50 years with a pole barn warranty.
2) Vinyl Siding
Are you interested in building a detached car garage? Maybe you want to follow the latest trend and live in a pole barn.
Whatever your building needs, you can opt for vinyl siding. The pole barn exterior can match any existing building on your property. Plus, vinyl siding is an economical choice.
The installation process is fairly easy – you can do it yourself or hire a contractor. However, faulty installation can result in long-term issues (e.g., bulging, cracking, or warping). In addition, some construction warranties only last a year and may not cover craftsmanship.

3) Engineered Wood Siding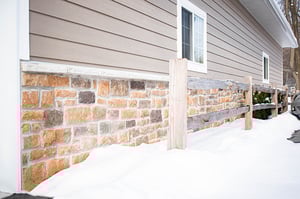 At first, contractors turned to vinyl and fiber cement siding to imitate wood but fell short. As a result, smart siding was developed and introduced to the marketplace.
This product has a “more realistic texture than most fiber cement and vinyl products, making them a great choice when you want the traditional look of lap or shake shingle siding.”
Depending on the vendor, smart siding is available in a full range of profiles and colors. You’ll also find out that engineered wood is 20% to 50% cheaper than its natural alternative.
Like vinyl siding, you’ll need to hire a contractor to install the smart siding. Because of its locking clips, smart siding is fastened and secured right away. It’s lightweight and easy to work with if you’re the only person working on the building project.
4) Versetta Stone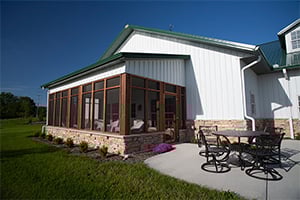 Versetta Stone is a stone veneer siding panel that is mortarless and cement-based. Its panelized design is installed with mechanical fasteners, allowing carpenters and contractors to recreate the beauty and craftsmanship of authentic stone masonry using nails or screws.
This masonry detail is available in three styles: Ledgestone, Tight-Cut, and Carved-Block. All panel products include accessories to finish the job correctly (e.g., wainscot caps, receptacle boxes, or adhesive).
Almost any siding contractor or carpenter can install Versetta Stone panels. There’s no need for metal lath or scratch coats. A mason saw will be used to cut pieces to the desired length and a common angle grinder to dress edges where needed. The panels must line up with the tongue and groove system, secured by a nail or screw – no painting, coating, or sealing necessary.
5) Brick
Brick siding is a viable option for your pole barn exterior. It’s a popular choice for commercial businesses and residential dwellings – post frame or stick-built.
Brick is relatively low maintenance due to its durability. It won’t dent or rot, unlike steel, vinyl, and wood siding.
With that being said, brick is relatively expensive compared to its counterparts. Again, your post-frame builder will prep your pole barn for the material, but you’ll need to hire a contractor to hang the panels.
Interior Finishes
1) Plywood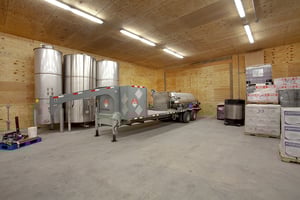 If you want to work with a finishing material that's lightweight and easy to install, we recommend using plywood.
Plywood is a good alternative to be considered if you’re looking for a warm, natural look like the wood grain of plywood inherently brings.
If you plan on using part of your building for storage, or even a mechanic area, we recommend using plywood for the walls. It’s much stronger than what drywall would be (although drywall is easier to repair if it gets damaged).
But, with the structural strength that plywood offers, it’s a good alternative to keep in mind if you know you’re going to be hanging tools on the wall.
2) Oriented Strand Board (OSB)
Ironically enough, OSB and plywood are formed from smaller pieces of wood and come in large sheets or panels. However, that is where their similarities end.
OSB is made of many smaller pieces of hardwood and softwood mixed in strands. While plywood is often 6 feet per sheet, OSB may be much larger, up to 12 feet per sheet.
The larger sheets may be a selling factor for some customers, but there is a downfall. OSB is not used for finished surfaces because it cannot handle paint or stain the way plywood can. Therefore, it is generally installed beneath a finished material.
3) Drywall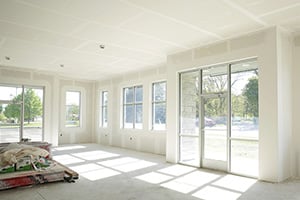 Drywall is a great option if you’re building a new post frame structure or remodeling an existing pole building.
Drywall installation for ceilings and walls is common practice, especially if you want to create a smooth, finished look.
If you know that you will be using drywall for interior walls in your building, we recommend letting your builder know before construction begins. The walls will need to be stud wall framed, and since they are not supporting a roof load, they can be placed wherever you desire.
4) Steel
Steel liner packages can be carried out in two ways; either on your walls or ceiling.
This is easily the most popular finishing option that our customers choose because it helps enhance the appearance of your building, giving the interior a more finished look.
A steel liner package also protects the insulation and the outside walls. If your insulation is unreinforced, it can tear easily, and sharp objects or power tools can damage even the best-reinforced materials.
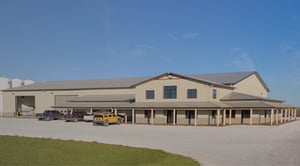
5) Combination (Steel & Plywood)%2c%20FBi%20Buildings.jpg?width=300&name=Combination%20(Steel%20%26%20Plywood)%2c%20FBi%20Buildings.jpg) A combination finish is extremely popular with our farm buildings, especially customers looking for a farm shop or even a combination building.
A combination finish is extremely popular with our farm buildings, especially customers looking for a farm shop or even a combination building.
They want to make sure their post-frame building design incorporates everything they’re looking for, which is a place to work on farm equipment and wash down implements.
One positive of using a combination finish is cutting some costs to finish your building.
Miscellaneous Features
1) Drainage & WaterIf your geographical location sees ample rainfall and wet winters, you understand the importance of proper drainage on a pole barn.
Examples of draining and water features:
- Gutters
- Downspouts
- Snow guards
2) Doors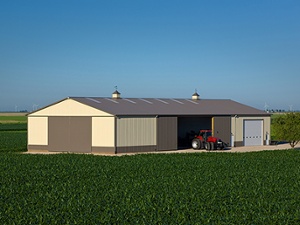 Having convenient access into your post-frame building is something worth thinking about.
Types of doors to use with your building:
- Sliding doors
- StepSaver Latch System
- Overhead doors
- Sliding doors
- Walk Doors
3) Foundation
Foundation is critical to focus on when your new post-frame building is being constructed. You want your pole barn to last, and the proper building components will do just that.
Foundation systems you can use with your post-frame building:
- Perma-Column System
- Laminated Posts
- Double Baseboards
- Bracket-to-Concrete
4) Natural Lighting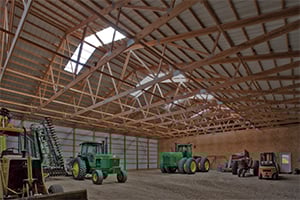 Natural lighting is necessary if you often plan to work in your pole barn. Having ample sunlight makes working easier.
Not to mention, certain window styles provide energy efficiency. Who could say no to saving money on energy bills?
Examples of natural lighting you can use with your post-frame building:
- Eave lite
- Sky lite
- Ridge lite
- Vinyl windows
- Fixed windows
- Half-Round windows
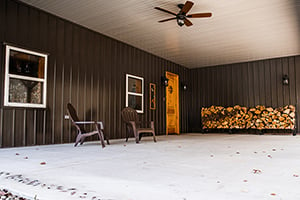
5) Lean-to/Porch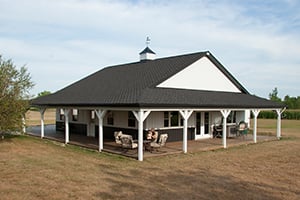 Having a lean-to or porch included in your building design adds character. Also, they offer shade and protection against the outside elements.
Different styles of porches you can include with your building:
- Soffit Porch ceiling
- Non-Soffit porch ceiling
- Continuous porch
- Drop-Down porch
- Welcome-way porch
6) Insulation Options
There are numerous options for finishing the interior of your pole barn. The purpose of your building will determine the look you wish to achieve.
Chances are you won’t need an extravagant finish if your pole barn is used for storage. However, you might want a completed look with insulation for your farm shop or office.
Examples of insulation options available to you:
- Thermax
- Vinyl back
- Sprayed Polyurethane Foam (SPF)
- Fiberglass insulation
- Building wrap

7) Condensation Control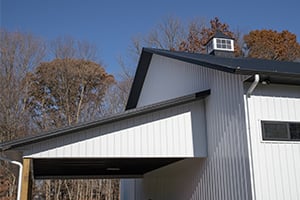 Condensation occurs when warm, moisture-laden air contacts a cooler surface, such as the underside of your roof steel.
If not taken care of right away, it can cause long-term damage. Adding ventilation features that combat moisture levels is a great way to avoid condensation.
Different ways you can prevent condensation with your building:
- Overhangs
- Ridge vent
- Cupolas
- OSB & Felt paper
- Bubble wrap
- MoistureLok
How much does a pole barn cost? This is a great question, but, unfortunately, there is no black and white answer. It's been nearly two years since COVID-19 became a global pandemic, and the reduced labor forces are still being felt.
Unfortunately, because of this, pole barn prices have started to fluctuate (supply and demand issues).
Do All Pole Barn Sizes Cost the Same?
A standard pole building shell can cost anywhere from $20 to $55 per square foot. Now, you’re probably asking yourself, “Why is there a big difference in price per square foot?”
The following factors will determine if your pole barn is leaning towards the low/high side of the cost spectrum:
- Total square feet
- Type of features (e.g., overhangs, windows, walk-in doors, steel liner packages, etc.)
- Current nature of the commodities market (the price of steel)
 To help you better understand where the price break comes from, here's a cheat sheet to help you get started.
|
1,199 sq. ft. or less |
$45 - $60 / sq. ft. |
|
1,200 to 2,500 sq. ft. |
$35 - $50 / sq. ft. |
|
2,501 to 4,000 sq. ft. |
$30 - $35 / sq. ft. |
|
4,001 to 8,000 sq. ft. |
$20 - $30 / sq. ft. |
|
8,001+ sq. ft. |
$15 - $25* / sq. ft. |
NOTE: Please keep in mind that these are ranges based on current commodity market prices. Therefore, these are not permanent prices and will fluctuate with the markets.
*Once you get to this square footage range, your cost will highly depend on your building features.
Site Costs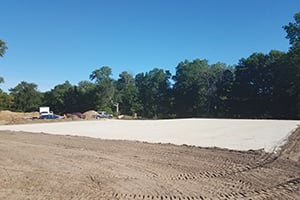 The most underrated expense of the building process is site costs. Site preparation is the work done on your land before pole barn construction.
This process lets you discover and resolve any site complications before it’s too late. The following factors drive site costs:
- Location and elevation
- Type of granular fill
- Building pad size
- Amount of object removal
Naturally, some projects will require more site prep than others, affecting the cost.
Below are the typical site costs for the following building types.
|
Agricultural |
$1,000 to $30,000 |
|
Residential |
$500 to $5,000 |
|
Commercial |
$1,000 to $50,000 |
|
Equine |
$500 to $20,000 |
NOTE: Please note that the information above are averages to help plan. In addition, costs may vary by project size.

Design and Permitting Costs
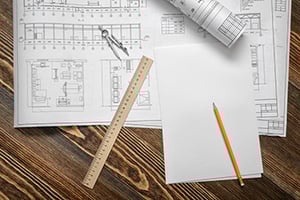 The design costs for your pole barn rely heavily on the type of structure you want to build. Other design considerations include pole barn size, external/internal features, and future preparation (e.g., pole barn additions, adding a loft for extra storage, or even finishing the interior of your pole barn with insulation and steel liner).
You’ll need to obtain a permit to move forward with construction. Permitting costs are based on the following factors:
- Building Size (square footage)
- Building Segment (Agricultural, Residential, Commercial, or Equine)
- Jurisdiction (state or county)
The best way to determine how much you will owe in permitting costs is to contact your city hall or county courthouse. Here’s an idea as to what you can expect:
Agricultural: $0 to $2,000
Please check to see if your county exempts ag-related buildings from permits. You’ll still need one, but it is free of charge.
Residential: $50 to $1,000
Depending on the site location, some residential buildings will require a permit from the town rather than the county.
Commercial: $1,000 to $100,000
Some commercial projects are required to obtain a permit at the state level. Also, commercial permits tend to be more expensive because they ask for:
- Mechanical Electrical Plumbing plans (MEPs)
- Architectural drawings
- Civil site drawings
- State’s stamp of approval
Equine: $50 to $3,000
The wide range of permitting costs is based on the fact that horse barns can be viewed as agricultural, personal, or commercial-use buildings.
On the bright side, most design fees (minus commercial properties) are included in the total package and are considerably less.
 In reality, financing a post-frame building has never been easier. The builder that you end up using for your final pole barn construction should have a list of lenders that they recommend using.
FBi has a list of six different pole barn lenders that we recommend reaching out to.
If you want to save yourself even more time, we recommend getting pre-approved before you even speak to a builder (especially if you’re going to build a post-frame home).
Post-frame homes tend to be more tedious in all aspects of planning (permitting, financing and constructibility). But don't let that derail you.
Depending on what lender you decide to go with, they also might need to know the following information:
- What type of building are you constructing?
- Do you need financing for a pole barn kit or a constructed pole barn?
- What’s the roof pitch going to be?
- What type of roofing and siding are you using?
- How many doors and windows are you going to be put in?
- Or, are you using sliding doors instead of overhead doors?
If you have difficulty getting a loan through your primary bank, we recommend reaching out to the following lenders.
They have specific terms and conditions for post-frame construction, which will make it easier for you in the long run.
- Compeer Financial
- New Century Bank
- Home Loan Investment Bank
- HFS Financial
- Home Equity Line of Credit (HELOC)
- Cash

 Arguably, one of the most time-sensitive issues with building a pole barn is the building schedule (when can your building get constructed)?
We realize that some completion dates are not flexible, while others might have more wiggle room.
On average, FBi’s current lead time is roughly three months. Some factors come into play with your lead time, such as:
- Building size
- Building complexity
- Interior and exterior features
- Construction method (will you need concrete, or are you building over an existing pad)?
Let’s look at the following examples to see when your pole barn would be erected.
- If you sign a contract by the end of February, your building shell will be completed in early June at the latest.
- Your building shell will be completed in mid-July if you sign a contract in late spring (March or April).
As mentioned above, FBi’s current lead time is three months (on average).
However, there are options to expedite this time frame by having a well-prepared building site and permitting complete. We’ll discuss these two areas in-depth in the following two sections.
Please keep in mind that if a customer is under a time constraint, our Project Managers will work with them to meet their deadline.
Disclaimer: The lead time of when projects get their building shell up fluctuates. It’s not uncommon for projects to get bumped up or down in the schedule if:
- Their sites aren’t well prepared
- They’re still waiting on final building permits
- They’re facing financing hurdles
NOTE: The lead time given for your project is for FBi’s portion of the job only. If you plan on finishing out the interior of your building with drywall, electricity, heating, etc., that will add more time to your completed date.
You’ll need to sit down and determine what type of permits you’ll need to move forward with your construction project. The building permit and their associated costs are based on the following factors:
- Building Size (square footage)
- Building Segment (Agricultural, Residential, Commercial, or Equine)
- Jurisdiction (state or county)
NOTE: The information listed below are averages to help with your planning. Costs may vary.
Agricultural Buildings
Depending on your building design and size, permits for farm buildings range from $0 to $2,000. Some counties exempt agricultural building permits. However, you’ll still need to get a permit (free of charge) before building. Contact your county’s Planning & Development office to see if your pole barn is exempt.
Residential Buildings
While factoring in building design and size, permits for residential buildings can cost anywhere from $50 to $1,000. If you live in an urban area, you may have to obtain a permit from the town rather than the county. The best way to find out is to contact your city hall or county courthouse.
Commercial Buildings It’s important to mention that the commercial permitting process varies from state to state. Some states require commercial projects to obtain a permit through the state they’re building in. Meanwhile, others request one from the local level.
Permits for commercial buildings range from $1,000 to $100,000. A large portion of these costs is due to commercial projects requiring Mechanical Electrical Plumbing plans (MEPs), architectural drawings, civil site drawings, and the state’s stamp of approval.
If you choose a builder who has a licensed engineer on staff, your permitting costs will lean towards the lower end of the spectrum. On the other hand, if your preferred builder doesn’t have a licensed engineer on staff, your permitting costs will be towards the higher end.
Equine Buildings
Depending on the scope of your project, permits for horse barns can cost anywhere from $50 to $3,000. This wide range is based on equine buildings being viewed as agricultural, personal, or commercial-use buildings.
Site preparation is the work done on your land before construction–finalizing location details, gaining access to the site, drainage, and more. This process allows you to identify site complications upfront and address them before construction begins.
Problems are much easier (and cheaper) to correct before equipment and schedules are involved.
We recommend you take seven tips to ensure proper site preparation.
1) Determine Building Location and Elevation When deciding, consider the flow of people and equipment–especially if you have multiple buildings. You will also have to determine what you want the elevation to be.
Helpful Tip: Elevation impacts drainage and managing where the water flows. Your post-frame builder will be glad to help you decide what’s best for your unique property and building needs.
2) Site Access
Good site access allows equipment and materials to be delivered quickly and efficiently.
Factors to consider to ensure you have proper site access:
- Road, driveway, and culvert width
- Location of mailbox
- Location of power lines
- Location of existing buildings, bins, etc.
- Location of trees
- Turning radius of semis
3) Perimeter Access
The construction crew needs room to move around. Maintaining a clear and dry perimeter will allow materials, equipment, and crews to move swiftly.
A stockpile of fill or gravel material near the building pad may restrict equipment flow or retain water. You also have to consider all four sides of your building pad.
Ensuring that all obstacles are out of the way will make for a smoother and quicker construction process.
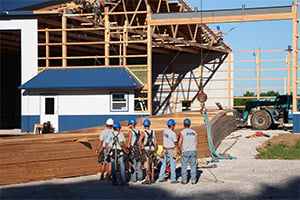
4) Protecting Your Investment (Safety)
 If you think that protecting your property and reducing your risks is your builder’s responsibility, then you’re right.
Your builder should value safety and take steps to assure you of that. But unfortunately, some job site hazards are already on your site, and you may not even realize it.
5) Preparing Your Building Pad
These are important aspects of preparing your building pad from pad structure, fill type, and drainage...all of these are important aspects of preparing your building pad.
Here’s a good overview to help you get a general idea of how to prepare your pad.
- When to build your pad: Before building your pad, you need to analyze the benefits of each season and determine the ideal time to build.
- Pad structure: Before the construction of your pad takes place, you (or your excavator) need to highlight key areas (dependent on your site) to ensure the pad is executed correctly.
- Fill type: It’s vital to discuss the different fill types and their advantages before starting.
- Drainage: To minimize condensation within your building, it’s important to review proper drainage. If done incorrectly, it can cause long-term effects on your building.
6) Setting Your Crew Up to Win
 When your crew is set up to win, they build more efficiently. In addition, a proper building pad allows their work schedule to be more predictable, regardless of the weather.
Everything will affect how the crew moves around your site from site access to the building pad.
7) Finishing Your Project On Time
With multiple parties working together to meet your deadline, scheduling factors need to be considered.
Five scheduling factors to ensure your project gets finished on time:
- Look for a builder to help you facilitate a project schedule and pull in an excavator to understand and meet deadlines early on.
- Locate underground obstructions and hazards. Do they need to be relocated or removed before site preparation to minimize re-work?
- Site preparation, in some instances, may be executed during the design and permitting phase. Check with local building officials to verify if a permit is needed to start your earthwork.
- It’s ideal to prepare a weatherproof site (gravel drives, gravel perimeter accesses, and gravel staging areas in addition to a gravel building pad) before the start of construction. This minimizes project delays due to possible muddy site conditions.
- Keep in mind the schedule and duration of excavation will be affected by how your excavator is set up and operates (size and type of equipment, competencies & specialties, crew power, backlog, etc.).
As a result, some projects will require more site prep than others, affecting the cost.
Below are the typical site costs for the following building segments:
|
Agricultural |
$1,000 to $30,000 |
|
Residential |
$500 to $5,000 |
|
Commercial |
$1,000 to $50,000 |
|
Equine |
$500 to $20,000 |
NOTE: Please note that the information are above averages to help with your planning. In addition, costs may vary by project size.
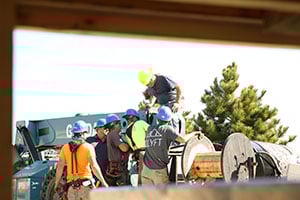
FBi’s implementation of the QLYFT building system is the next big step in improving post-frame construction and empowering customers to build with confidence.
What is the QLYFT Building System?
The QLYFT building system is an unprecedented way of erecting post-frame structures. It was created to improve field employee safety while taking building quality to new heights.
What are the Key Benefits of the QLYFT Building System?
While increasing safety measures, we discovered other advantages not offered with your typical pole barn.
1) Enhanced Quality Control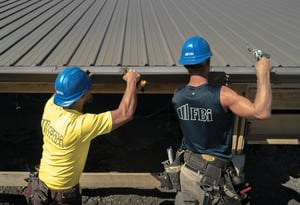 Construction crews can install flashing, gutters, and overhangs at the waist level. This installation reduces the chance of pole barn damage (e.g., leaks) and repairs during/after the building process.
2) Transparent Inspection
Next, customers can inspect their roof, gutters, trims, and trusses with the QLYFT building system.
This level of transparency isn’t available with conventional construction practices due to building height and safety concerns.
3) Less Strain on Building Materials
The QLYFT building system makes it easier for construction crews to keep the trusses and walls straight, reducing the racking and twisting of building materials.
These components are plumbed and squared 39’’ above the finished floor instead of 16’ and higher.
4) Fewer Project Delays Due to Inclement Weather
During QLYFT construction, your post-frame building is less vulnerable when assembled near the ground level.
Because it’s closer to the ground, the wind isn’t as much of a hindrance when hanging trusses and running metal roofing panels.
This building system is designed to lift roofs in windy conditions (up to 30 mph).
5) Improved Construction Crew Safety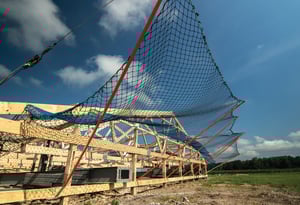 Netting is installed along with the lower roof system and building exterior.
Workers don’t have to worry about scaling tall buildings or, worse, falling off. Instead, they can focus on constructing a higher-quality pole barn.
The building process is also easier on one’s body, resulting in lower turnover rates among tenured employees. In addition, this level of experience allows for unmatched construction quality.
6) Reduced Power Line Costs & Delays
Because QLYFT construction occurs near ground level, you can build closer to overhead hazards. As a result, it can save you time and money while increasing flexibility on building location.
With standard post-frame construction, you have to call the electric company to de-energize the cables so field employees won’t get zapped. You may have to relocate power lines in some cases, and your provider will hold you responsible for the cost.
Download our FREE QLYFT Building System Guidebook, which explains the significant benefits, details how its components work together and answers potential concerns you may have as a first-time buyer.
As you can see, there are multiple factors to consider when you decide to move forward with your post-frame building project.
Ultimately, how you choose to design your building is up to you.
No matter who you choose for construction, your preferred builder should walk you through each of the steps listed above to help get your project started, stay on schedule and under budget.
As a preferred builder in the Midwest, our job is to make sure that you have the necessary tools for your pole barn planning process.