

As you scroll through your social media feed, you’re bound to see a successful “do-it-yourself” (DIY) project or handcrafted goods for sale.
As you embark on a late-night YouTube rabbit hole, you’re bound to come across some DIY videos.
Since the pandemic, the DIY industry has exploded, and understandably so. Consumers are quarantined at home with the sudden urge to take up a new hobby (and make a few bucks) or finally tackle that home improvement project (and save money on contracting it out).
In fact, the home improvement market size reached $798.1 million last year. This astronomical number proves that DIY isn’t going anywhere, making it a movement and not the latest fad.
Do you plan on starting a DIY home improvement project, such as reskinning the old pole barn in your backyard?
If so, we’ve got you covered. This article will teach you how to reskin your post-frame building in five easy steps.
How to Reskin Your Pole Barn in 5 Easy Steps:
1. Finalize your pole barn design
2. Measure your pole barn and order building materials
3. Prepare the construction site (e.g., staging area, clear brush, rent equipment)
4. Remove the old metal panels from the post-frame building
5. Install the new metal panels onto the pole barn

4 Reasons Why You Should Reskin Your Pole Barn
We wish post-frame buildings would last forever, but unfortunately, that isn’t the case. You may be able to hold off on some barn repairs while others demand your immediate attention. Below, we discuss the four reasons why you should consider reskinning your pole barn.
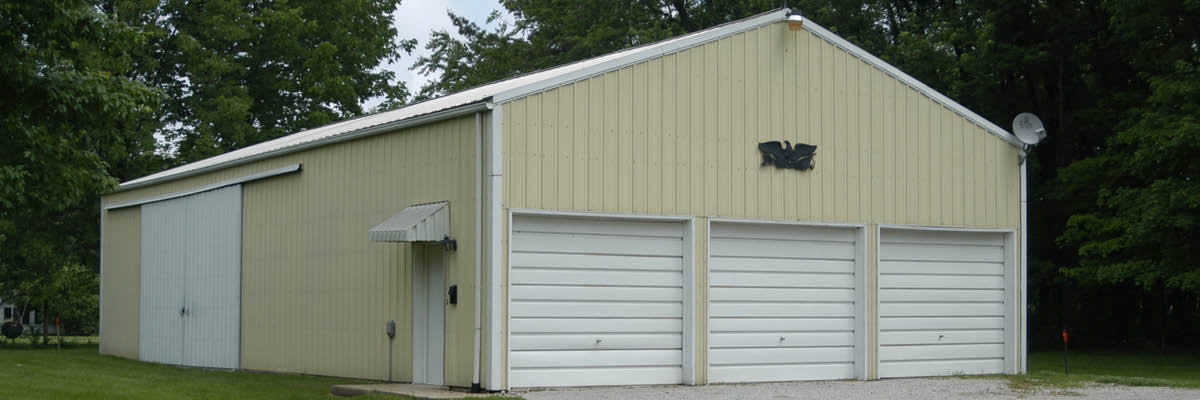
1) Your pole barn is showing aging signs.
 The metal panels might have faded or chalked if your post-frame building was constructed before the 1990s.
Fading occurs when the environment attacks the pigment portion of the paint system. When metal panels are continually exposed to sunlight, they will lose their original color.
Chalking occurs when ultraviolet (UV) radiation damages the resin, allowing the pigment particles to resurface as a powdery substance. Other degradation contributors include acid rain and air pollution.
The area of your post-frame building that receives less elemental exposure will fade or chalk at a slower rate.
Editor’s Note: These aging effects are noticeable with darker colors. Lighter hues still fade and chalk, but their appearance is duller.
Unfortunately, these conditions are inevitable, but the right pole barn paint system will keep your steel siding looking new year after year.
Pre-1990s post-frame buildings were most likely coated with silicone-modified polyester (SMP) paint.
However, modern pole barns use polyvinylidene fluoride (PVDF), popularly referred to as Kynar 500®. Its unique formula produces excellent resistance to aging and weathering. Watch the video below to learn more about the benefits of choosing a PVDF paint system.
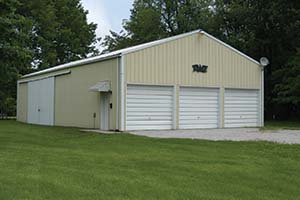
2) Your pole barn has some damage (accidental or storm-related).
As much as we hate to think about it, pole barn damages are unavoidable. Accidents happen. Mother Nature lashes out.
Whatever the case, you may consider reskinning your post-frame building, especially if the structural integrity remains intact. With a little TLC (and some new metal panels), your pole barn will look good as new.
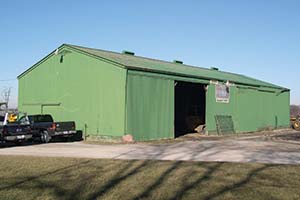
3) You want to change your pole barn color combination.
 Buyer’s remorse – we’ve witnessed this sense of regret in our 60+ years of business in the post-frame industry.
Some customers kick themselves for not adding extra square footage to their building size, but that’s a story we’ll save for another time.
Meanwhile, others wish they would’ve picked a different pole barn color combination.
Of course, the same can be said for someone who purchased property that includes a post-frame building. Pea-green isn’t your style.
But all is not lost. While you can’t turn back time, you can reskin your pole barn with a paint color that fits your aesthetic better. For example, Ash Gray, Brandywine, Clay, or Evergreen will be a great choice if you prefer earth tones.
Editor’s Note: Sure, you can hire someone to paint over the current color, but you may void your builder warranty in the process. Please read the fine print before moving forward with this alternative solution.
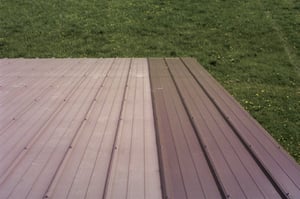
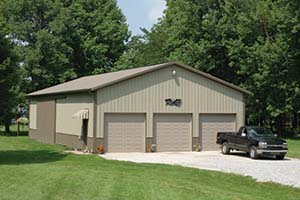
4) Your pole barn needs to be re-sealed.
 Some post-frame buildings have had multiple purposes in their lifetime.
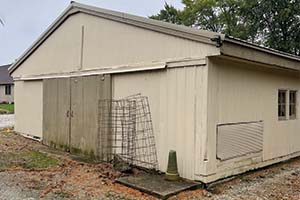
For example, this pole barn was a chicken coop turned dog kennel turned cold storage.
As you can see, this structure lacks a base trim, and the steel siding has been patched over time. The new owner wanted to reskin the post-frame building to eliminate drafts, stop pesky leaks, and increase curb appeal.
Ultimately, reskinning your pole barn prolongs its lifecycle, guaranteeing its usefulness for the next generation.
How to Reskin Your Pole Barn in 5 Easy Steps
Now that you’ve decided to reskin a post-frame building on your own, we can walk you through the construction process. We consulted with our in-house Repair and Renovation Specialists to create these steps.
1) Finalize your pole barn design.
 First, you should sit down and familiarize yourself with the building features you’d like to include with your pole barn reskin.
For instance, do you like the idea of installing wainscoting? Do you want to add trim around your walk door and windows?
These examples are the questions you must ask yourself before moving forward with your renovation project.
After all, you’ll need to account for and measure those extra building materials that weren’t included in the original design.
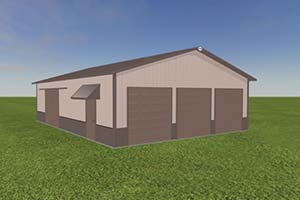
Editor’s Note: Please feel free to use our Design Online Tool to visualize the changes made to your pole barn.

2) Measure your pole barn and order building materials.
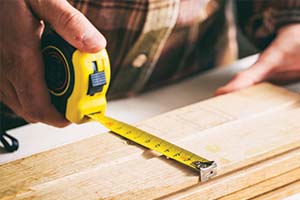 Now that you know how your post-frame building will look, you can grab a tape measurer and jot down some dimensions.
For starters, you need to measure the length, width, and height (from the roof peak).
Next, you should measure out every 3’ (the standard width of a metal panel) to know how many sheets it will take to reskin your pole barn. You might want to pad the final number if you make a cutting mistake.
Then, you need to measure the corners of the post-frame building for trimming. This building material is typically measured in 10’ increments. As for door and window trim, we recommend J-channel or box trim for maximum energy efficiency.
If your pole barn has gutters or soffits underneath the overhangs, you must measure and update those building features. And don’t forget to order plenty of fasteners!
Once you’re done measuring, we recommend taking your dimensions to a post-frame builder. Not only do they offer high-quality building materials, but they can review your math skills and make sure that your quantities are correct. Sometimes that peace of mind is needed (and appreciated) with DIY projects!
3) Prepare the pole barn construction site.
 After picking up your building materials, you must store them in a dry staging area. Like new post-frame construction, we recommend using a gravel lot to keep your supplies clean and undamaged.
Moreover, it would help if you ensured the job site is clear of overgrown landscaping or trash that may be in the way of equipment and building materials.
Depending on the size of your pole barn, you might have to rent a scissor lift. Typically, we use a ladder on renovation projects less than 16’ tall.
Furthermore, you need a dumpster for siding removal. A 30 or 40-yard dumpster will work just fine. But if you’re unsure about the size, a dumpster rental company can help you select the right one.
4) Remove the old metal panels from the pole barn.
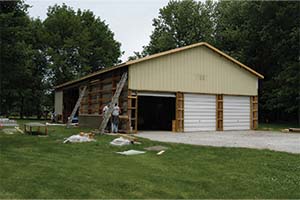 And now, the moment you’ve been waiting for – removing the steel siding. Since metal is relatively sharp, you should wear a pair of gloves.
Start by removing any exposed nails or screws. If you don’t see any fasteners protruding, you can remove the metal panels. We recommend picking a building corner and working your way around the pole barn in small sections.
For nails, you should insert your crowbar or flat bar between a metal panel and the one covering its edge. Run the tool back and forth parallel until you locate a nail. Grip the nail with a cat claw and pull it out.
If your steel siding consists of screws, you’ll need a drill and drill bit to remove them.
Repeat this step for each fastener. Toss the old ones in a 5-gallon bucket that can be easily transported to the dumpster.
Be careful when removing nails or screws. You don’t want to accidentally drop the metal paneling on top of yourself – another good reason to wear a hard hat or personal protective equipment (PPE).
You shouldn’t have a problem separating the metal panels that were fastened together. Carefully set them aside for disposal or repurposing.
Editor’s Note: You might encounter unexpected complications like rotted columns or sidewall girts once the demolition is complete. Be prepared to replace these building components.
5) Install new metal panels onto the pole barn.
 Finally, you’re in the home stretch! Start this last step by ensuring the wooden framing is square and plumb.
Square means that the building corners are 90 degrees. Plumb means the columns are in a straight line vertically. A carpenter’s level will help determine if your post-frame building is square and plumb.
Then, you can cut the steel using a circular saw. You’ll need a sawhorse to support the metal panel as you cut it. We recommend using longer pieces because you can always make them shorter (if needed), not the other way around. You might have to use a grinder or snip to cut in hard-to-reach areas (e.g., along a concrete floor).
Start by installing the base trim and laying down the metal panels. Again, it would be best to work your way across the pole barn in small sections.
Editor’s Note: You should reskin the back or hidden side of your post-frame building first. There is a learning curve with DIY projects. No one will notice if you make a mistake (unless they go out of their way to look for it).
Lastly, mark screw holes on the steel siding with a hammer and awl. These indicators tell you exactly where to put the drill and drill bit.
Will You Reskin Your Pole Barn, or Do You Need Assistance?
As one of the top pole barn builders in the Midwest, we want to ensure your renovation project is successful.
Some DIYers describe this experience as enjoyable and rewarding, especially if they have a general understanding of post-frame construction. Meanwhile, others are surprised by how time-consuming it can be.
Maybe you’ve decided that DIY isn’t the best option for you. After all, reskinning your pole barn is a major commitment.
But it doesn’t mean you have to give up on this home improvement project. You can always request a quote from our Repair and Renovation Specialists.
Ultimately, we hope the hard work pays off, and your post-frame building is Pinterest-worthy!
Do you have more questions about pole barn renovations that are not covered in this article? If you need help designing and planning, please contact FBi Buildings at 800.552.2981 or click here to email us. If you’re ready to get a price, please click here to request a quote, and a member of our sales team will call you.